There’s something so charming about a weathered, vintage terra-cotta pot — like it’s been soaking up sunshine on a European balcony for decades. The good news? You don’t need to wait 50 years or hunt through antique stores to get the look. With a simple lime wash technique, you can transform any terra-cotta pot into a beautifully aged piece in just a few minutes. Even better, this is a fun and affordable way to upcycle thrifted terra-cotta pots you find at secondhand stores or flea markets.
This post may contain affiliate links which might earn me a small commission at no cost to you. THANK YOU for supporting me and the quality items I promote!
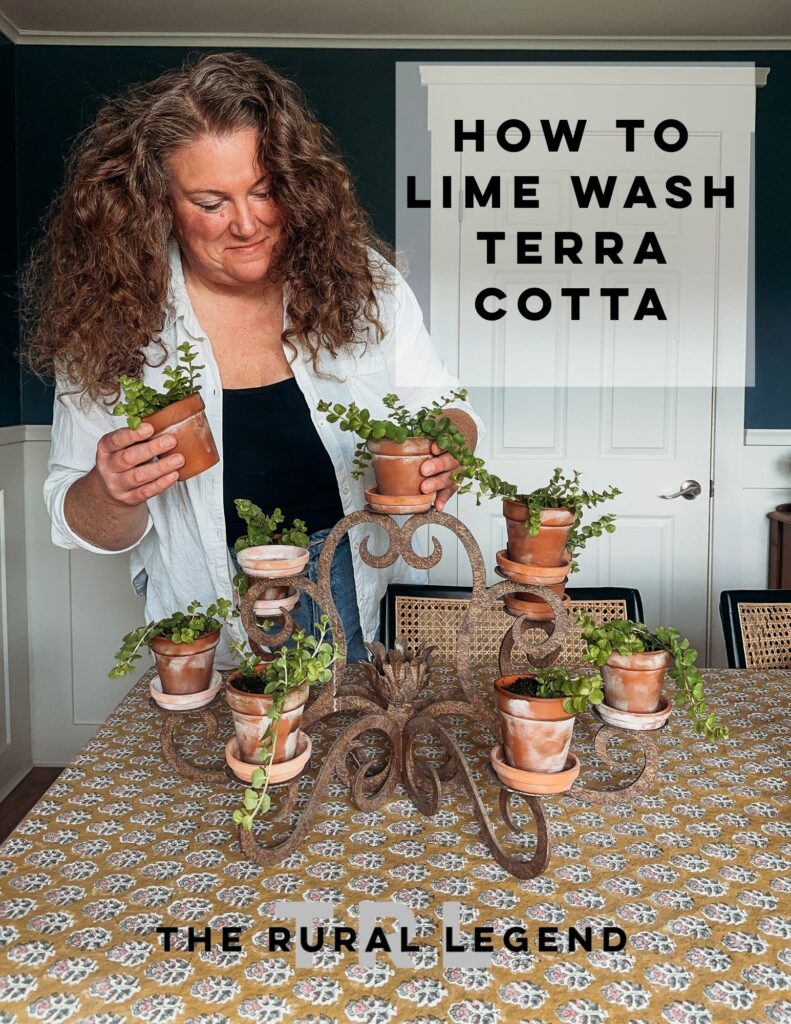
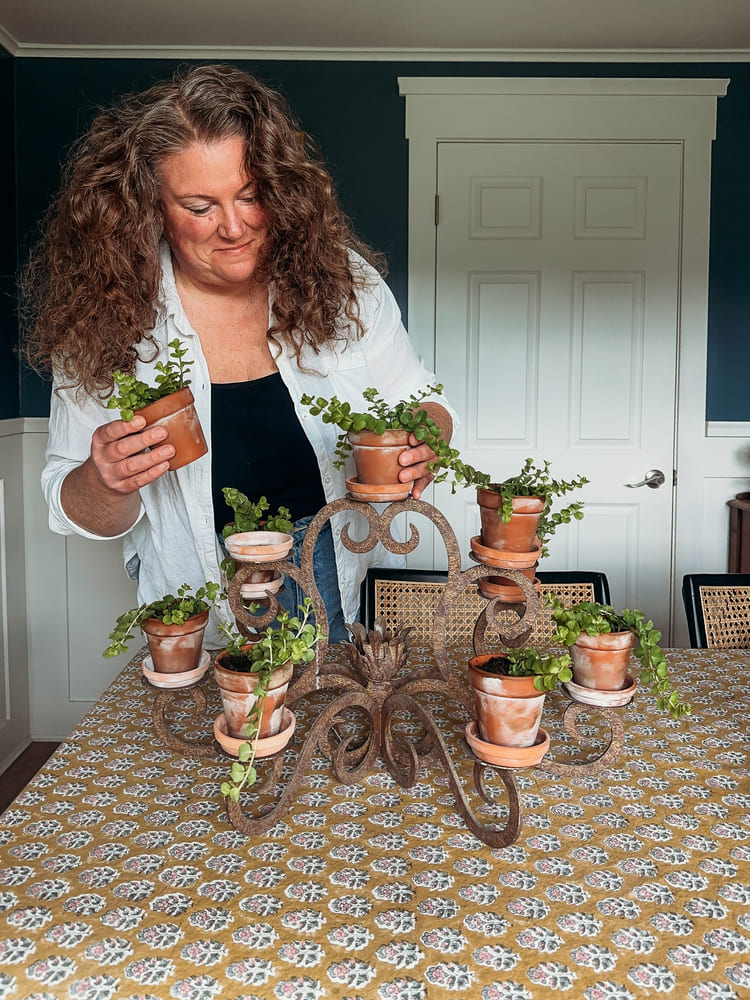
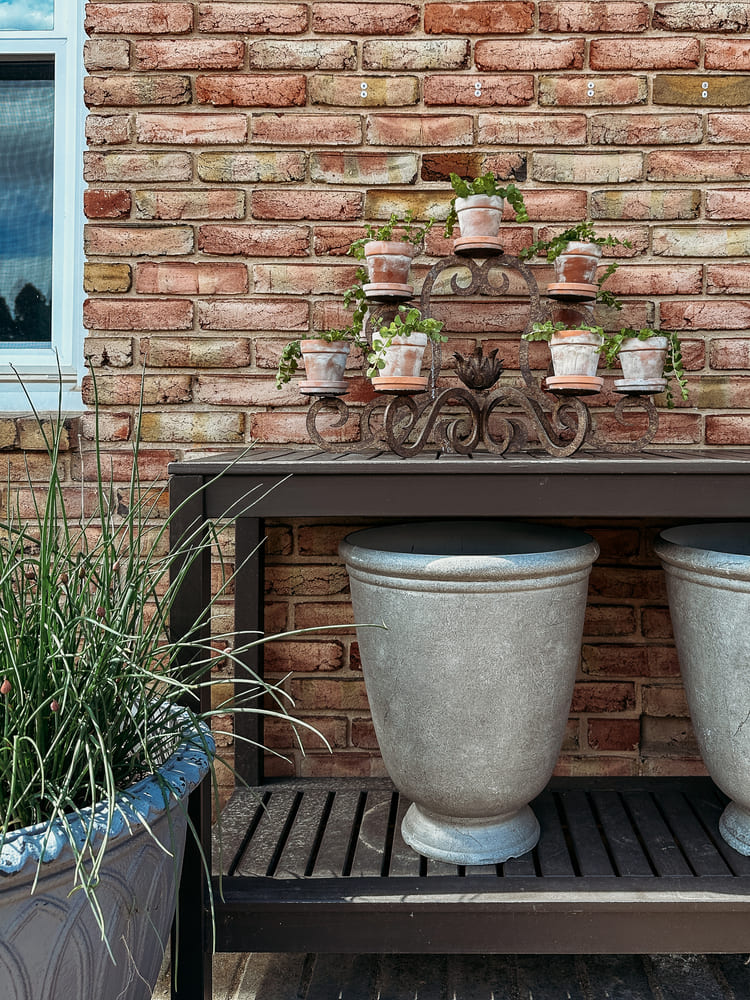
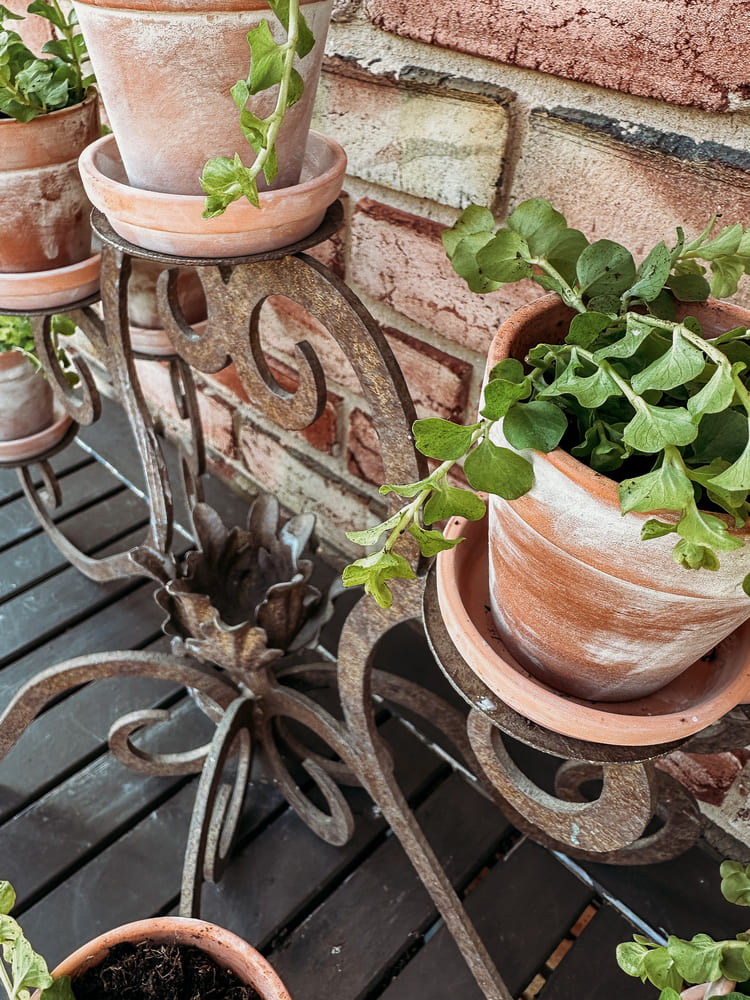
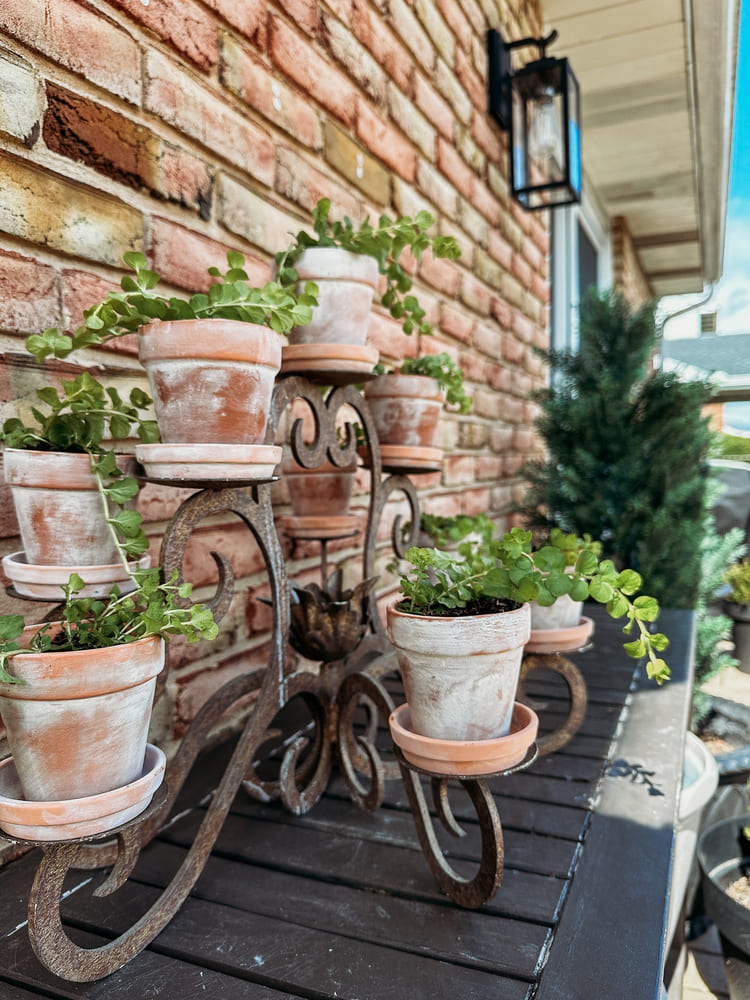
I recently thrifted a metal pillar candelabra for $7 and realized it would make the perfect stand for mini terra-cotta pots. This thrifted upcycle project turned out so beautifully! The aged look of these lime-washed pots paired with the vibrant trailing Creeping Jenny plants adds so much texture and charm to our back patio.
pedestal planters / outdoor table / plant stand is a thrifted candle holder
Thrifted tip: Pedestal planters or outdoor table plant stands can be creatively repurposed — like using a vintage candle holder for added height and dimension!
Here’s how to do it:
What You’ll Need:
- Terra-cotta pots (new or old — just make sure they’re clean and dry)
- Garden lime (hydrated lime or lime powder — found at most garden centers)
- Water
- Small mixing container (like a plastic cup or bowl)
- Paintbrush or chip brush
- Sandpaper (optional)
- Sealer (optional, for outdoor use)
Step-by-Step Instructions:
1. Clean your pots.
Start by wiping down your terra-cotta pots to remove any dust, stickers, or dirt. If you’re using secondhand pots, give them a gentle scrub to remove any residue or mineral buildup. Allow them to dry completely before applying the lime wash.
2. Mix your lime wash.
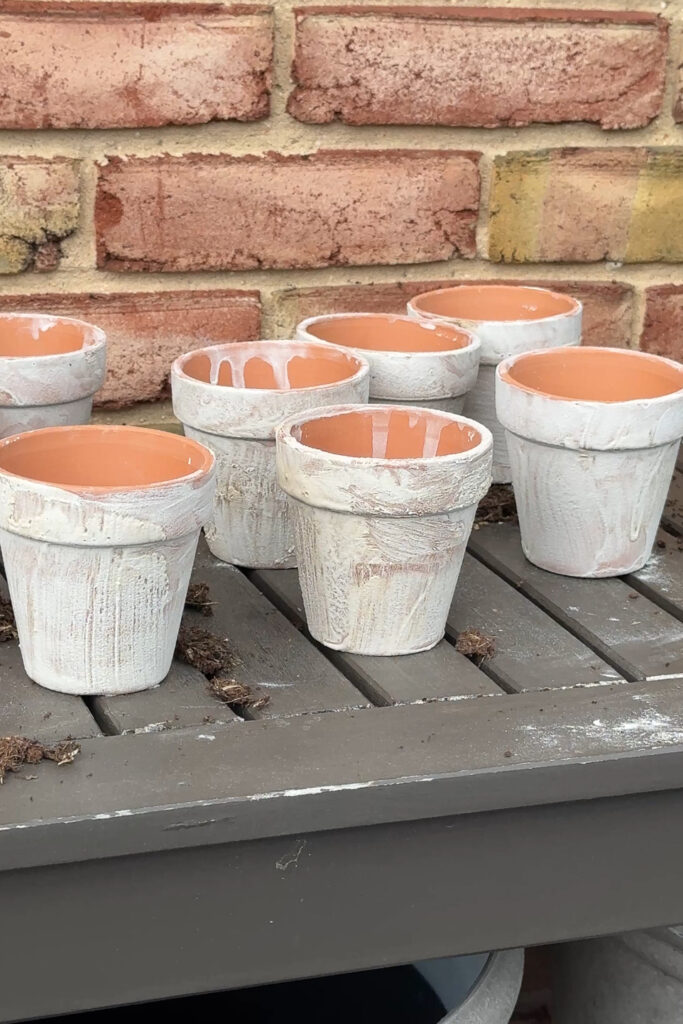
In a small container, combine 1 part garden lime to 2 parts water. Stir the mixture until it has a milky, watery consistency — thinner than regular paint. It should resemble skim milk in texture.
Note: Garden lime can appear white or brown depending on the brand — both work perfectly fine.

3. Apply the lime wash.
Use a paintbrush or chip brush to generously apply the lime wash to your pot. Don’t worry about brush marks — the imperfect, uneven application helps achieve that authentic aged look.

4. Let it dry.
As the pot dries, the lime wash will fade into a beautiful, soft chalky white. Drying time can vary but usually takes about 15–30 minutes, depending on humidity and temperature.
5. Add a second coat (optional).
For a bolder, textured finish, feel free to add a second or third coat after each layer dries. In my project, I applied about four coats to get a deeper patina, which added fantastic texture and depth.
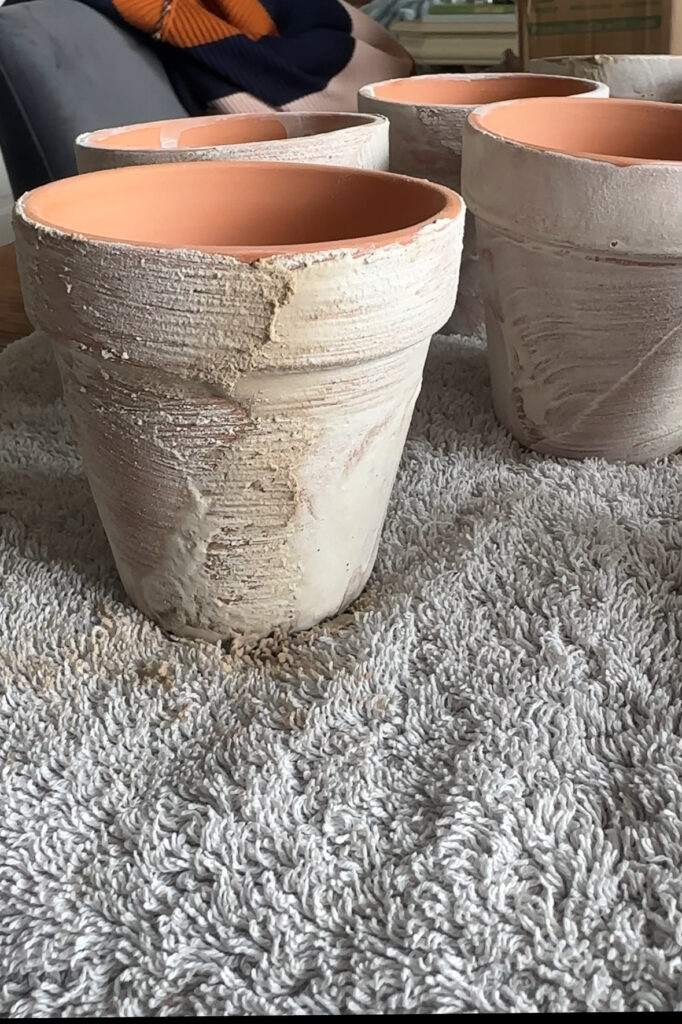
6. Distress (optional).
To create even more of an aged effect, lightly sand parts of the pot with fine-grit sandpaper to let the terra-cotta peek through. This dusty process is best done outside or in a ventilated area.
7. Seal it (optional).
If your lime-washed pots will live outdoors, consider sealing them with a matte spray sealer to help preserve the finish. Even with indoor use, sealing helps prevent the chalky residue from rubbing off, especially when watering plants.
Style Tips:
- Mix lime-washed pots with plain terra-cotta for an organic, layered garden look.
- Use them indoors for houseplants, kitchen herbs, or decorative storage.
- Stack or cluster them for a curated feel on shelves or tables.
Why Lime Wash?
Lime wash is a traditional technique used for centuries to give surfaces a sun-kissed, vintage look. It’s made from natural ingredients, is easy to apply, and gives your terra-cotta pots a timeless European charm — all without any harsh chemicals. Best of all, it’s a budget-friendly and eco-conscious way to bring character into your home or garden.
If you try this project, I’d love to see your lime-washed beauties! Tag me and use #SecondhandSquad so I can cheer you on and share your creativity!
Let’s Stay Connected
Don’t miss a single opportunity to be inspired by signing up for our weekly newsletter for exclusive tips, sneak peeks, and a recap of the week’s ideas! Scroll to the bottom of the page to subscribe – it’s free!
xoxo, L